Friday, December 20, 2013

Sweet and Salty Holiday Treat

If you are looking for a sweet and salty easy treat, I have just the recipe for you. Growing up my mom made these delicious treats for every holiday. They are so good and provide that sweet and salty taste you want to have. They are so simple to make, and here is how:

First things first, you will need:

  • Your choice of Hershey Kisses. I made some with the hugs, mint truffle, and the candy cane. (I tried the caramel filled ones and they did not turn out well-very messy! I think that plain Hershey Kisses are too much milk chocolate. But try what you want!)
  • Holiday M&M's. It's Christmas time, so I will be using those. However, my favorite are the Easter ones. You can also use any kind of M&M you want! I used peanut butter ones in the past, those were pretty good.
  • Pretzels. You can also use whatever shape of pretzel you like. I just use the original "tiny twist" pretzels.
  • An oven!
The most important part to this treat is that you preheat the oven!!!!!!!!!!

Set the oven to 200F or 93C. It is so important that you let the oven warm up first. I made the mistake of putting them in right away and the kisses never melted, they just got rock solid and burned.

Next get a flat pan. This recipe requires a full day's use of a pan. So if you are doing other activities that you need a pan for, you may want to wait to do these late at night so they can sit over night or get some cheap pans at the dollar store (my favorite place on earth).


Pour pretzels onto the pan and pull out the broken ones. Eat the broken ones or throw them back in the bag for later eating.


Unwrap the kisses and put them on the center of the pretzel. Continue until your pan is full!
I recommend that you do NOT mix types of kisses! They melt at different rates and that just gets confusing and difficult.


After the oven is heated up, place the pan carefully into the oven. Turn the light on if you have one.
Find something easy to do near your oven because these babies melt quick! It is kind of fun to watch them melt... so you might try that too.

Once the tips of the kisses have begun to sag, take them out of the oven.


Drop one M&M on each pretzel bite. I like to try and get it right on the tip of the kiss and push it toward the center of the pretzel. Be careful because the treats are very gooey. So you don't have to push too hard on the M&Ms.


Once each bite is covered with an M&M, you let them sit. It takes a while, but eventually they will get hard. An option for faster cooling is to put them in the fridge. Sometimes when you do this, however, your treats will get white lines on them. You can always give it a try and see what happens.

 These are the Candy Cane Kisses pictured to the right.


After they have cooled, you can pop them off the tray and serve! I put mine in a poly treat bag that is Christmas Decorated and tie them shut with ribbon. A perfectly easy Christmas Gift!


I hope you enjoyed my tutorial! Please leave feedback or questions!

- Happy Crafting!
                  Ali 

Wednesday, October 10, 2012

Salt and Pepper Shakers

So I saw a pin on Pinterest for these cute glasses and I really liked them.
 
I bought myself a super cute Dishware set at Kroger that had a bunch of different colors in it and I thought it would be cute to make salt and pepper shakers to match. So here they are!

 These are my plates, they come with turquoise, yellow, and green in the centers, I love them and got them for 40% off!
So I am just going to give the jist of how to make these. I thought about buying actual salt and pepper shakers but they were $3.99 a piece! Sorrrrryyy. Not buying it. So I skimmed every isle looking for the perfect shaped glass container... Hello Garlic! So these were $1.27 a piece, and they came with something inside... garlic. Then I bought acrylic paint and used a q-tip to put dots all over them of the different colors.
 Here is the back... So then you put them in the oven when it is cold and then heat it to 300 degrees for 30 minutes, then let it cool.. It dried the paint very well and I am assuming it makes it permanent?
 I drilled holes in the lids, and I still want to paint them black...
 I then sprayed this gloss clear coat on it because it was a matte texture. I think I made it too thick over the P because it discolored a little.
I really like these but I think there is more that I want to do with them.
 
Thanks for reading! Questions or comments are always welcome!
 
Happy Crafting!
-Ali


Making "The Tree of Life"

Okay so I was just pinning away when I came across this...
And I was like... "I WANT THATTTT"
 
So I "liked" it. Today I was feeling down so I went to Hobby Lobby for some retail therapy, although I had no plans on spending money.... I ran into these people in the jewelry section and they were looking for a tree charm for a "Hippy Friend". And it clicked! So I got out my phone and showed this stranger this pin and she loved the idea so much she hugged me! Which was kinda nice since I was feeling down all day. Then I said to myself, "Why don't you make the tree of life necklace too?" So I got some wire and beads and the hoop thingy. And since I have been having this slight obsession with sea foam green, that's the tone of beads I got. So now that I have rambled enough, I am going to tell you how to make one for yourself!

Here is the final product:


First things first... You will need...
 

  •  Beads - I got glass ones that were teeny tiny ($3.99.. but on sale!)
  •  Aluminum Wire- I got the 22 gauge Silver. I watched some YouTube videos and those people used smaller wire, but I liked the thicker one. (the higher the gauge the smaller the wire) ($1.99)
  • A loop- I got the "Hammered Teardrop" you could get any one you want, or make one with wire.. But it was only $1.47 so why not?
  • Pliers- on the YouTube videos people were using wire holder things but those were ten bucks and I am more of a budget friendly kind of girl, and pliers work JUUUSSSTT FIINEE.
Next you have to create a loop for your chain or whatever you choose to use to hang your pendant from...
Depending on what your loop is made out of, there are many ways to do this. Were just going to stick to my scenario for this one. So I took about three inches of the wire and bent it in half. Then I folded the wire over the loop and put the cut ends through the little hole.and wrapped it around the part closest to the loop.. This part is probably confusing.. but I had to figure it out on my own and I am sure you can too, in fact it might even be better than mine. Here are two pictures that may better explain themselves.


Okay, next you have to add the branches on! So you take about six inches of wire and bend it in half like so.. Do this six times.


Then you put the wire so the bend is holding the loop and you twist it. Use your fingers for this! Well start the first twist with your fingers then you can use the pliers to twist, but be gentle because it breaks easily.
 
 Do that six times....
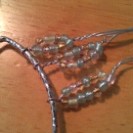
Now it is time for beads! You are going to take one of the "branches" and string beads down them. One of the videos I watched had a system to how many beads you put on, but then it says it depends on how big your beads are. I used 4, and 5. My beads were different sizes so the branches came out different lengths. Which is what is supposed to happen. you are going to put everything inside the loop in the end, so that may help you judge how many you want to put on... I ended up taking a few off at the end because it was too big... So you strand the beads down each half of the wire then twist it at the end of the beads. Twist about twice...
Do this for all six branches.
Then you fold the top two branches to the inside of the loop and twist the wires of those together. Continue this until all six branches are twisted together on the inside.
Next you twist the whole trunk together.. you want to spread the wires out a little at the bottom so the trunk flares out a little.. Then you want to pull the roots tightly under the loop, and starting from the center, wrap them around the edge of the loop, once or twice.
Now you can see that there are obviously some silly roots dangling from your tree! You may like them, I don't know.. If you are like me, then you will chop them! So you can either use wire cutters if you have them, or if you are poor and thrifty like me, you will use the pliers to bend the ends back and forth until they fall off.. make sure you leave a little extra space so that the roots wont be on the front of your tree!
 
Lastly, yes, can you believe it? LASTLY.. you push down the edges of the wires against the rest in the back, that way they aren't stabbing anyone...


And there you have it! your very own tree of life pendant!!!
 
Sorry these pictures are so small! Apparently my phone takes beautiful pictures until you try to view them on the computer..
I appreciate any comments! And let me know how your tree of life came out, and post pics too!!!!
 
Happy Crafting!!!
-Ali


Thursday, September 27, 2012

Pinterest vs Homework

So right now I am at school waiting for my exam at 7:30 pm.. Only two and a half more hours! I have been wanting to start a blog, so decided to do that instead of studying math! I also have a two page (or maybe more?) paper due tomorrow. So I guess that should be on my to do list... But I CAN'T STOP PINNING! Whats wrong with me??? I am obsessing over a purple sewing machine that I want from Big Lots and its only $30! I mean that's a serious deal! Problem is I don't have money (well technically I do... just don't want to spend it) and I need a house for all my crafts! In the process of purchasing a home, I will have to warn my boyfriend of all of the crafting I will be doing and our home decor is going to be Alified! So now that the world knows what my intentions of life are, I will get back to homework... or maybe pinning.. :)