And I was like... "I WANT THATTTT"
So I "liked" it. Today I was feeling down so I went to Hobby Lobby for some retail therapy, although I had no plans on spending money.... I ran into these people in the jewelry section and they were looking for a tree charm for a "Hippy Friend". And it clicked! So I got out my phone and showed this stranger this pin and she loved the idea so much she hugged me! Which was kinda nice since I was feeling down all day. Then I said to myself, "Why don't you make the tree of life necklace too?" So I got some wire and beads and the hoop thingy. And since I have been having this slight obsession with sea foam green, that's the tone of beads I got. So now that I have rambled enough, I am going to tell you how to make one for yourself!
Here is the final product:
First things first... You will need...
- Beads - I got glass ones that were teeny tiny ($3.99.. but on sale!)
- Aluminum Wire- I got the 22 gauge Silver. I watched some YouTube videos and those people used smaller wire, but I liked the thicker one. (the higher the gauge the smaller the wire) ($1.99)
- A loop- I got the "Hammered Teardrop" you could get any one you want, or make one with wire.. But it was only $1.47 so why not?
- Pliers- on the YouTube videos people were using wire holder things but those were ten bucks and I am more of a budget friendly kind of girl, and pliers work JUUUSSSTT FIINEE.
Depending on what your loop is made out of, there are many ways to do this. Were just going to stick to my scenario for this one. So I took about three inches of the wire and bent it in half. Then I folded the wire over the loop and put the cut ends through the little hole.and wrapped it around the part closest to the loop.. This part is probably confusing.. but I had to figure it out on my own and I am sure you can too, in fact it might even be better than mine. Here are two pictures that may better explain themselves.
Okay, next you have to add the branches on! So you take about six inches of wire and bend it in half like so.. Do this six times.
Then you put the wire so the bend is holding the loop and you twist it. Use your fingers for this! Well start the first twist with your fingers then you can use the pliers to twist, but be gentle because it breaks easily.
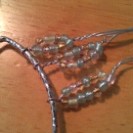
Now it is time for beads! You are going to take one of the "branches" and string beads down them. One of the videos I watched had a system to how many beads you put on, but then it says it depends on how big your beads are. I used 4, and 5. My beads were different sizes so the branches came out different lengths. Which is what is supposed to happen. you are going to put everything inside the loop in the end, so that may help you judge how many you want to put on... I ended up taking a few off at the end because it was too big... So you strand the beads down each half of the wire then twist it at the end of the beads. Twist about twice...
Do this for all six branches.
Then you fold the top two branches to the inside of the loop and twist the wires of those together. Continue this until all six branches are twisted together on the inside.
Next you twist the whole trunk together.. you want to spread the wires out a little at the bottom so the trunk flares out a little.. Then you want to pull the roots tightly under the loop, and starting from the center, wrap them around the edge of the loop, once or twice.
Now you can see that there are obviously some silly roots dangling from your tree! You may like them, I don't know.. If you are like me, then you will chop them! So you can either use wire cutters if you have them, or if you are poor and thrifty like me, you will use the pliers to bend the ends back and forth until they fall off.. make sure you leave a little extra space so that the roots wont be on the front of your tree!
Lastly, yes, can you believe it? LASTLY.. you push down the edges of the wires against the rest in the back, that way they aren't stabbing anyone...
And there you have it! your very own tree of life pendant!!!
Sorry these pictures are so small! Apparently my phone takes beautiful pictures until you try to view them on the computer..
I appreciate any comments! And let me know how your tree of life came out, and post pics too!!!!
Happy Crafting!!!
-Ali


No comments:
Post a Comment